Showing posts with label DIY. Show all posts

Tuesday, October 28, 2014

My Childhood Best Friend Got Married


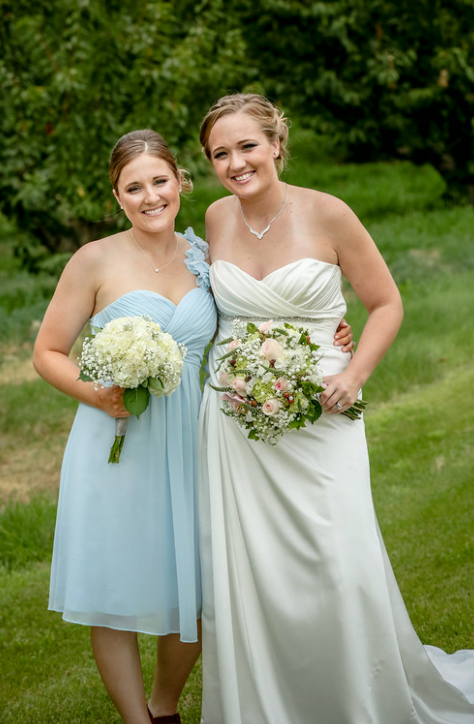
Ashley, the beautiful bride.  Sums up our friendship lol.

Selfie with the bride.

Sean, mom, dad, Ashley, and myself.


I got the pleasure of making the signs for the wedding and had a blast.  
I know I mispelled chicken breast, but I fixed it prior to the wedding lol.


My adorable parents.

Family Photo

Walking down the aisle.

The Bridal Party, such a fun group!


Sign welcoming guests into the wedding

Mr. & Mrs.

The First Kiss as a married couple.


Loved being apart of this wedding especially since I was there in the beginning for their first date at sophomore year homecoming.  I have known Ashley since the 6th grade through playing basketball together and being stuck at the hip.  We were inseparable throughout middle and high school and I am so thankful for her in my life.  Thank you Ashley and Trevor for letting me be apart of your special day.  Such a fun wedding and such a special couple!


Thanks for reading!

-Hayley


Sunday, October 26, 2014

What My Fall Has Looked Liked

Made a burlap banner to hang in my house.

Made pumpkin spice latte at home.  

Made applesauce with family from the trees in our backyard.

My mom and I made felt pumpkins.

Spent time with Rudy while working from home.

Celebrated my dads birthday.

Have been traveling all over Western Washington, even taking ferries to recruit students to the University of Idaho.


Being a Young Life leader at costume club and sharing Jesus with middle schoolers.

Leading with Katie who is awesome.

My fall has been extremely busy, but it is my favorite time of year.  What has your fall been like?


Thanks for reading,

Hayley


Monday, July 7, 2014

First Burlap LOVE Banner


I am trying to use my craftiness more lately.  I have been wanting a LOVE banner on my headboard that was made from our old fence that fell down.  Read how the fence headboard was made here.  I decided to finally sit down and make the banner myself.  I was really proud of how it turned out.  I chose white instead of black letters to make it a little more warm on the wood.  I love it, get it?!  I have made a lot more burlap banners since I wrote this post and I am excited to share them with you and that I have improved with every banner I make. 

Friends, thanks for sticking with me since I haven't posted in a while. 

-Hayley  


Saturday, February 22, 2014

Afraid to Create

I am so afraid of creating art or something meaningful in my life.  I thought I was lazy and didn't have the time, but lately, I have come up with any and every excuse not to create.  I am too busy, I want to watch a show instead, it takes to long to set up my space, to put everything away, yadda yadda.  It is me.  I am my own worst enemy when it comes to creating art.  I actually love creating, but I think it is at the end, when it is said and done and I stare at my tapestry and am so extremely critical of myself.  WHY?  Are people going to tell me that is sucks?  Well, then they suck, lol.  What am I creating for?  My house, for relief, to relax, for my own personal enjoyment?  My husband and my best friend are my best cheerleaders.  It is pretty funny actually, I could take a piece of foil roll it up in a ball and they would both give me praise.  That is why I love them.  But honestly, I need to get over myself, use a talent that God has given me and create something!!!!

So with that being said, I am going to create a painting.  I have been oggling (is that even a word?) over the birch trees and I am going to try.  If I screw it up, then I can start over and create something else, but at least I attempted, or am going to....

So world, and to myself, here I go!


I used acrylic and painted this for Sean.  There is even a little heart with our initials.  Hope you like it, Sean sure did!


Thanks for reading along!

-Hayley

Tuesday, December 10, 2013

DIY Wood Fence Headboard


When we bought our house the front part of the fence had fallen down and needed to be replaced.  Instead of burning the wood or throwing it out, I saved it for over a year and my cousin Cory made me a head board for my birthday!  I have been drooling over the ones I have seen on Pinterest and have wanted one since we moved into our house in late June of 2012.  My original inspiration came from:


House Tweaking .  They did an amazing job and I loved the 'love' on the board, but did not want to paint it as I wanted it to be natural.  I might add a burlap banner with love on it later.  Check out their blog as they have a step by step way to make one as well.

Materials used:

-Four old fence boards
-Flush mount hangers, they look similar to this:

-Two 4x something size boards.  Cory bought them at Home Depot so not sure what size and he cannot remember.  Rule of thumb, just make sure they are shorter than the headboard, so they do not show.
- A handy cousin good with tools and an amazing husband to help install it.
-the black hinges were from the old fence gate and of course, I had to use them.


Cory laid the boards down on the ground to see what they would look like.


He used the dark brown board to hold the boards together (see it in the middle) and added the newer boards from Home Depot to match together.  


In this picture the flush mount hangers are being screwed onto the first board that is on the fence boards.  Then the other board will have the flush mount hanger to be connected onto the wall.


What is nice about having the flush mount hangers is that you only screw the base boards into the wall studs. So there is minimal holes in the wall.  And it is very stable.  Pretty awesome!


Then you connect the flush mount hangers together from the headboard to the base boards on the wall. It slides on like a puzzle.  


Overall, after minimal supplies were purchased, it took Cory about 1 1/2 to complete the project.  The longest part of the project was triple checking measurements for exact, straight and easy installation.  


Finished project!  I am very happy and in love with my headboard.  Thanks Cory and Sean!


Thanks for reading friends!

-Hayley